Water Heater Repair in West Chester, PA
Your water heater is essential to daily comfort in West Chester, PA. Cold winters, seasonal temperature swings, and local hard water can accelerate wear or cause sediment buildup that reduces performance.
Common water heater issues in West Chester homes
- No hot water: Complete loss of hot water can stem from failed heating elements, a tripped breaker, a bad thermostat, or issues with gas pilot/ignition on gas models.
- Inconsistent or lukewarm temperatures: Thermostat failure, partially failed heating elements, cross-connections, or sediment insulation around elements can cause uneven heat.
- Leaks: Leaks at fittings, the temperature and pressure relief valve, drain valve, or a corroded tank indicate different repair paths. Local hard water can speed corrosion at fittings.
- Pilot or ignition problems (gas units): A weak pilot flame, thermocouple failure, or clogged burner assembly are typical causes. Cold, damp air in basements in winter can affect ignition reliability.
- Sediment buildup: West Chester’s mineral content often leads to sediment collecting on tank bottoms and elements, lowering efficiency and causing noise, overheating, or element burnout.
- Water too hot or rapidly fluctuating: Faulty thermostat settings or malfunctioning thermostats create safety risks and comfort issues.
How technicians diagnose water heater problems
A clear, methodical diagnosis reduces unnecessary repair work and finds the root cause quickly:
- Initial visual inspection: Check for visible leaks, corrosion, drain valve condition, venting (gas), and flame appearance.
- Verify power or gas supply: Confirm breakers, fuses, gas shutoff, and gas pressure as applicable.
- Temperature and pressure checks: Measure outlet temperature, inspect the temperature and pressure relief (TPR) valve, and test water pressure to rule out plumbing cross-connections.
- Component testing: For electric units, test heating elements and thermostats for continuity. For gas units, inspect the pilot assembly, thermocouple, burner, and gas valve operation.
- Sediment assessment: Drain a small sample to check for sediment and test anode rod condition where accessible.
- Safety inspection: Confirm venting and combustion air for gas units and verify proper relief valve operation.
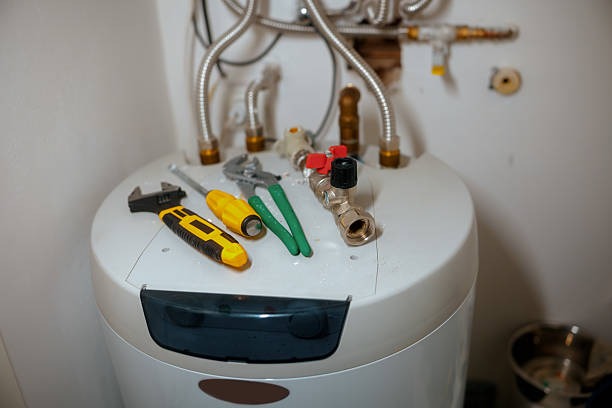
Typical repairs and common parts replacement
Repair work focuses on safety and restoring reliable hot water performance. Common components replaced include:
- Heating elements (electric): Replace if burned out or heavily scaled.
- Thermostats: Replace when inaccurate or failed. Dual-element tanks often require matching both elements and thermostats.
- Valves: TPR valves and drain valves are routinely replaced when leaking or failing to operate.
- Anode rod: Replaced to protect tank integrity and extend life.
- Pressure regulators and mixing valves: Address scalding risks or temperature fluctuations.
- Thermocouple or ignition components (gas): Replace when pilot or ignition fails repeatedly.
- Tank replacement: Recommended when internal corrosion, leaks, or catastrophic element failure indicate an end-of-life condition.
Emergency response and troubleshooting you can do now
If you suspect a dangerous condition or a major leak, shut off power (electric breaker) or gas supply and the cold water inlet if safe to do so. For nonemergency troubleshooting:
- Check circuit breakers and reset if tripped.
- Verify the pilot light is lit on gas units. If it will not stay lit, avoid repeated attempts - this suggests a thermocouple or gas control issue.
- Drain a small amount from the drain valve to check for sediment or to relieve pressure. Avoid fully draining unless you are sure of the valve condition.
- Listen for loud rumbling or popping noises that suggest heavy sediment buildup.
Emergency response protocols typically include quick triage over the phone, prioritization of gas leaks or active flooding, and sending a technician with the right parts based on your description.
Repair timelines and what to expect during service
- Diagnostic visit: Usually completed within 30 to 60 minutes on site, depending on access and system type.
- Minor repairs (thermostat, element, valve): Often completed the same day when parts are available. Electric element change or valve swap typically takes 1 to 3 hours.
- Moderate repairs (anode rod, drain and flush, burner cleaning): May take 2 to 4 hours.
- Major repairs or tank replacement: Replacement and full system setup can take a full day and may require scheduling for equipment delivery and permits if applicable.
Technicians will explain the diagnosis, outline repair options, and review safety issues and warranty implications before performing any work.
Safety inspections and warranty considerations
A proper safety inspection covers venting, combustion air, gas connections, electrical connections, and TPR valve function. For gas units, verifying correct vent draft and secure combustion is critical. Review manufacturer warranty terms before repairs; replacing certain components or failing to maintain the unit can affect coverage. Keep service records and anode replacement history to support warranty claims.
Preventative maintenance to avoid repeat failures
Regular maintenance extends water heater life and improves efficiency:
- Annual flush: Draining and flushing the tank to reduce sediment is especially important in areas with hard water.
- Anode rod inspection: Check every 1 to 3 years and replace when heavily corroded.
- Valve checks: Test the TPR valve annually and inspect drain valves for leakage.
- Thermostat settings: Keep the thermostat at a safe, efficient setting (typically 120 F) to prevent scalding and reduce stress.
- Install a sediment trap or water softener: In homes with very hard water, a whole-house water softener or a dedicated trap can reduce mineral buildup and extend component life.
- Routine safety checks: Annual combustion and venting inspections for gas models help prevent carbon monoxide and combustion hazards.
How to prepare for and schedule service
When arranging a repair appointment, have these details ready to streamline the process:
- Water heater type (electric, gas, tankless), brand, model, and age if known.
- Description of the problem and how long it has been occurring. Note noises, leaks, or recent changes in water quality.
- Accessibility considerations (basement steps, tight utility closets) and any pets or gate codes the technician should know about.
- Any prior service history or warranty information and whether an anode rod has been replaced previously.
Expect a technician to provide a timed appointment window, arrive with basic diagnostic tools and common replacement parts, and walk through findings and repair options before starting work. For urgent safety concerns such as gas odor or active flooding, the response is prioritized.
Understanding these steps and local factors unique to West Chester helps reduce downtime and keeps your hot water reliable throughout the year. Regular maintenance and timely repairs prevent larger failures and protect your home from damage.